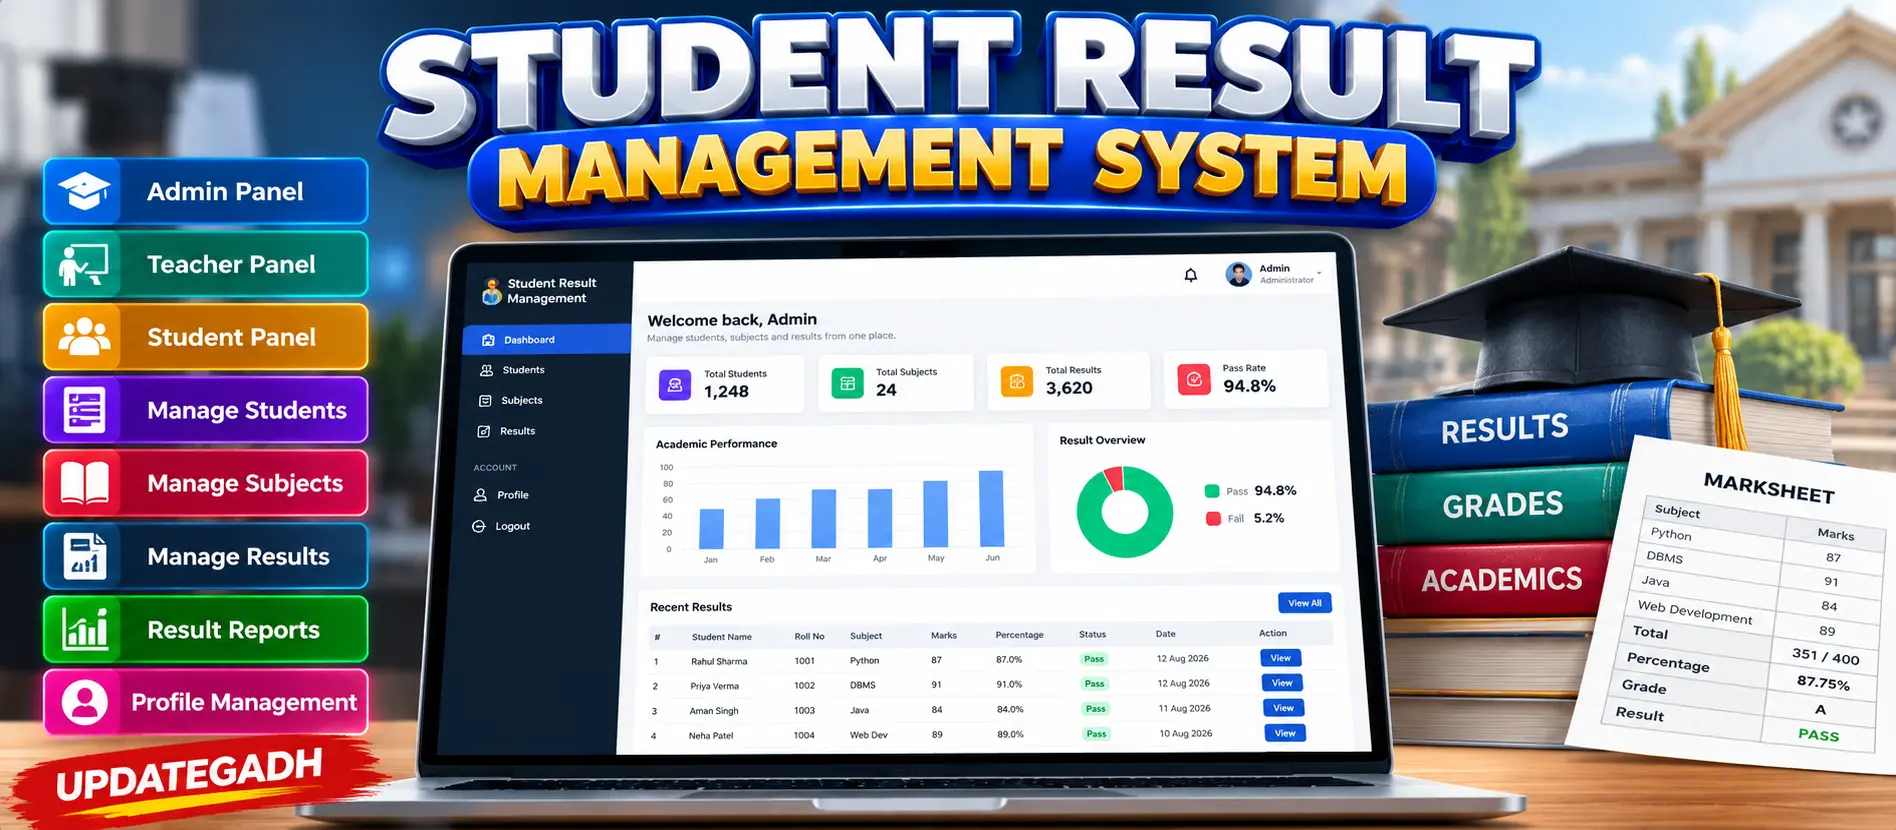
Student Result Management System Using Python and Django
Student Result Management System built with Python, Django, HTML, CSS, JavaScript, and SQLite3 for managing student records, subjects, marks, examination results, authentication, and role-based access for administrators and students.
What You Will Get
Project Overview
The Student Result Management System is a web-based application developed using Python and Django with SQLite3 for managing academic records digitally. The system allows administrators to manage student information, subjects, and examination marks while students can securely access and view their academic results.
The application provides separate access for administrators and students, helping educational institutions manage result-related activities in a more organized and efficient manner.
Available Features
- Admin login
- Student login
- Student registration and management
- Add, edit, and delete student records
- Student name, roll number, course, and contact information
- Subject management
- Result entry
- Marks management
- Student result viewing
- Result access using roll number or login credentials
- Academic record management
- Responsive user interface
- Role-based access
Student Management
Administrators can add, edit, and delete student records. Student information such as name, roll number, course, and contact details can be maintained within the system.
Subject Management
The Subject Management module allows administrators to add and manage subjects required for result processing. Subject information can be updated when academic requirements change.
Result Entry
Teachers or administrators can enter marks for students in their respective subjects. The digital result-entry process helps maintain examination records in an organized manner and reduces manual paperwork.
Result View
Students can access their academic results using their login credentials or roll number. This provides quick access to performance information without depending on manually distributed mark sheets.
Authentication and Access
The system provides separate login access for administrators and students. This helps protect academic information and ensures that users can access the functionality associated with their role.
Responsive User Interface
The interface is designed to work across desktop and mobile devices, allowing administrators and students to access the result management system conveniently from different screen sizes.
Technology Stack
- Programming Language: Python
- Framework: Django
- Frontend: HTML, CSS, JavaScript
- Database: SQLite3
Software and Tools Required
- Python
- Visual Studio Code
- Web Browser
- pip
- Virtual Environment
More Details and Full Documentation
View Complete Student Result Management System Documentation
Project Modules
Student Login Module
Student Management Module
Student Registration Module
Student Profile Module
Subject Management Module
Result Entry Module
Marks Management Module
Result View Module
Academic Record Management
Role-Based Access Module
Authentication Module
Responsive UI Module
SQLite3 Database
Installation Guide
1. Install Python on your computer.
2. Install Visual Studio Code.
3. Extract the project folder.
4. Open the extracted project folder in Visual Studio Code.
5. Open the terminal inside the project folder.
6. Create a virtual environment using: python -m venv venv
7. Activate the virtual environment using Windows command: venv\Scripts\activate
8. Install the required dependencies using: pip install -r requirements.txt
9. Create and apply database migrations using: python manage.py makemigrations
10. Apply the migrations using: python manage.py migrate
11. Create an administrator account using: python manage.py createsuperuser
12. Enter the required username, email, and password when prompted.
13. Start the Django server using: python manage.py runserver
14. Open the local application URL displayed in the terminal.
15. Log in as Administrator to manage students, subjects, and results.
16. Students can log in using their credentials or access their results using the supported roll number option.
FAQ for this project coming soon.
No reviews yet. Be the first to review!
Write a Review
Related Projects
 20% OFF
Featured
20% OFF
Featured
 33% OFF
Featured
33% OFF
Featured
 38% OFF
Hot
38% OFF
Hot
 33% OFF
Featured
33% OFF
Featured