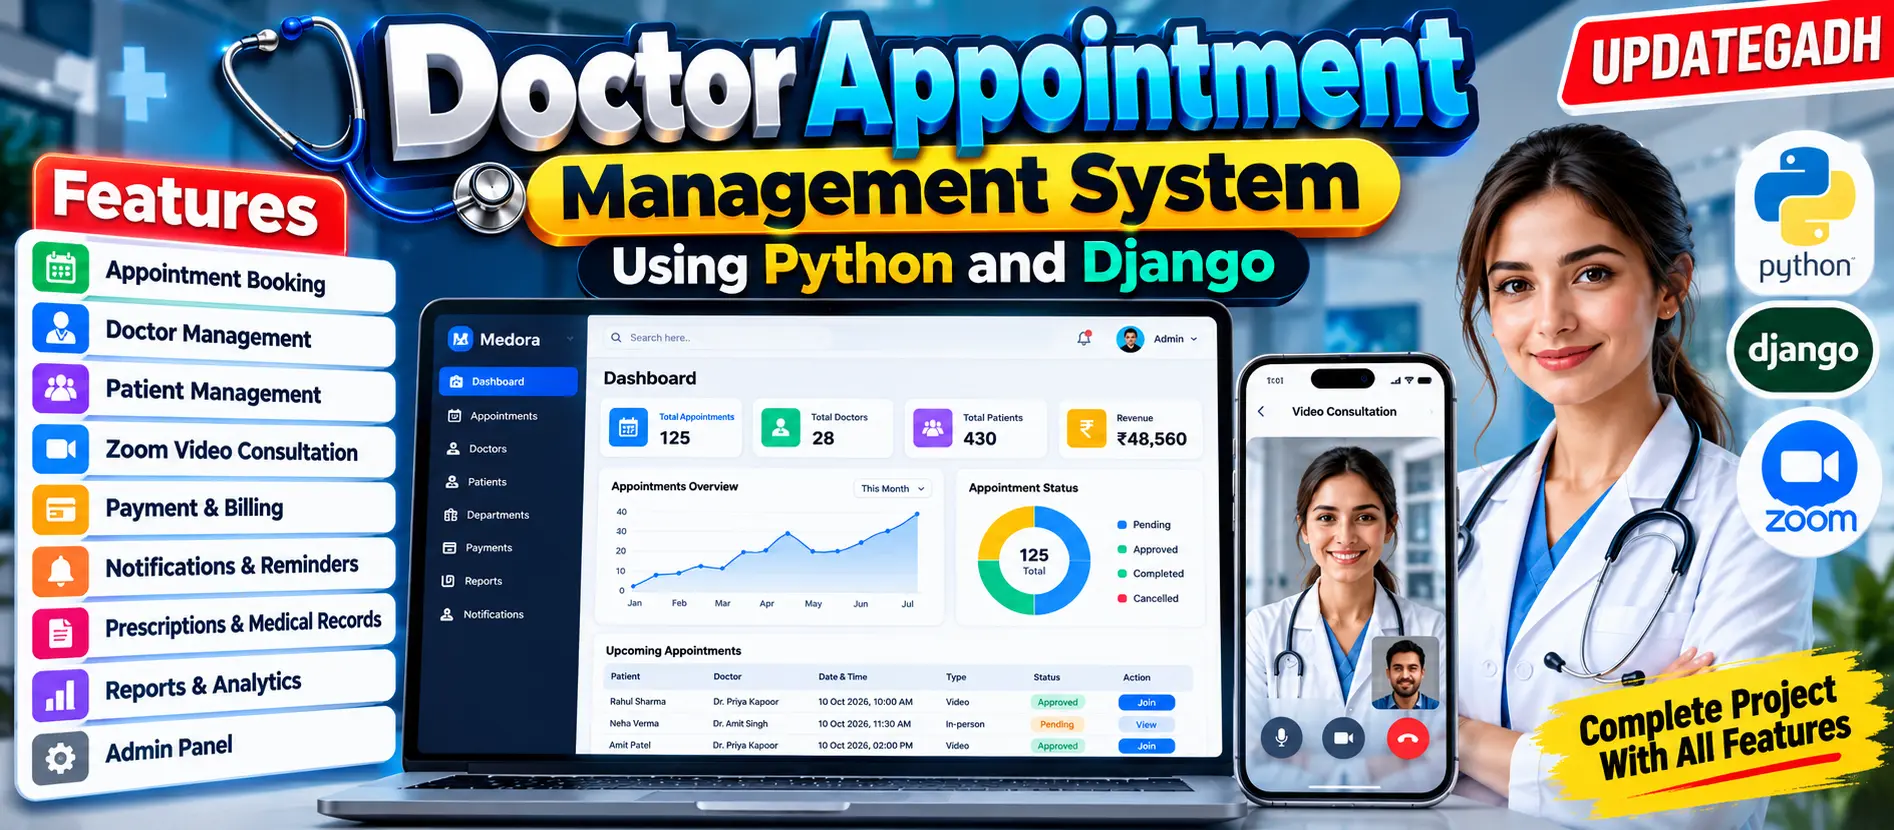
Doctor Appointment Management System Using Python and Django
Doctor Appointment Management System Using Python and Django is an advanced healthcare web application for managing patients, doctors, appointments, schedules, medical records, prescriptions, payments, invoices, notifications and online consultations. It provides separate Patient, Doctor and Administrator workspaces with Zoom Server-to-Server OAuth integration, dashboards, reports, charts, CSV exports and PDF receipts.
What You Will Get
Project Overview
Doctor Appointment Management System Using Python and Django is a complete web-based healthcare management application designed to simplify appointment scheduling and clinic operations. The system provides dedicated workspaces for Patients, Doctors and Administrators with role-specific access and workflows.
The application manages doctor profiles, specializations, availability schedules, time-off records, patient information, appointments, medical history, prescriptions, payments, invoices, notifications, reports and online video consultations. It is developed using Django 5.2 with server-rendered templates, CSS and Vanilla JavaScript.
Available Features
- Patient, Doctor and Administrator workspaces
- Email-based registration and login
- Email OTP verification
- Password reset and password management
- Doctor search and specialization filtering
- Doctor profile management
- Consultation fee management
- Weekly doctor availability schedules
- Doctor time-off management
- Appointment booking
- Next-of-kin appointment booking
- Appointment cancellation and rescheduling
- Appointment approval and rejection
- Appointment completion and cancellation
- No-show appointment handling
- Medical history and care information
- Medical notes and private notes
- Prescription management
- Online video consultation
- Payment and invoice management
- Payment and refund management
- Appointment reminders
- In-app notifications
- Optional email notifications
- PDF receipt generation
- Calendar views
- Dashboard analytics
- Reports and charts
- CSV exports
- Activity logging
Technology Stack
- Python
- Django 5.2
- Django Templates
- HTML
- CSS
- Vanilla JavaScript
- SQLite
- Zoom Server-to-Server OAuth
- Zoom Meetings API
- ReportLab
- Pillow
- Chart.js
- Bootstrap Icons
Software and Tools Required
- Python 3.10 to 3.14
- Django 5.2
- Visual Studio Code
- SQLite
- Modern Web Browser
- Internet Connection
- Zoom Account for Online Consultations
More Details and Full Documentation
View Doctor Appointment Management System Using Python and Django Details
Project Modules
2. Email OTP Verification Module
3. Password Reset Module
4. Patient Profile Module
5. Doctor Profile Module
6. Doctor Specialization Module
7. Doctor Availability Module
8. Doctor Time-Off Module
9. Doctor Search and Filtering Module
10. Appointment Booking Module
11. Next-of-Kin Appointment Module
12. Appointment Approval Module
13. Appointment Cancellation Module
14. Appointment Rescheduling Module
15. Appointment Completion Module
16. No-Show Management Module
17. Medical History Module
18. Medical Notes Module
19. Prescription Module
20. Zoom Video Consultation Module
21. Payment Module
22. Invoice Module
23. Refund Management Module
24. Notification Module
25. Appointment Reminder Module
26. PDF Receipt Module
27. Calendar Module
28. Administrator Management Module
29. Department and Specialization Module
30. Reports Module
31. Chart and Analytics Module
32. CSV Export Module
33. Activity Log Module
34. Role-Based Permission Module
Installation Guide
1. Install Python 3.10 to 3.14 and Visual Studio Code.
2. Extract the project ZIP file and open the folder containing manage.py in VS Code.
3. Open the VS Code terminal.
4. Create a virtual environment using: python -m venv .venv
5. Activate the virtual environment on Windows using: .\.venv\Scripts\Activate.ps1
6. Upgrade pip using: python -m pip install --upgrade pip
7. Install project dependencies using: python -m pip install -r requirements.txt
8. Create a .env file in the same directory as manage.py.
9. Configure the required Django, email and Zoom environment variables in the .env file.
10. Add Zoom credentials using: ZOOM_ACCOUNT_ID=your_account_id
11. Add the Zoom Client ID using: ZOOM_CLIENT_ID=your_client_id
12. Add the Zoom Client Secret using: ZOOM_CLIENT_SECRET=your_client_secret
13. Add the Zoom user using: ZOOM_USER_ID=me
14. Create a Zoom Server-to-Server OAuth application and activate it.
15. Configure the required Zoom meeting permissions for creating and updating meetings.
16. Run database migrations using: python manage.py migrate
17. Create the administrator account using: python manage.py createsuperuser
18. Check the project using: python manage.py check
19. Run the project tests using: python manage.py test
20. Start the Django server using: python manage.py runserver
21. Open http://127.0.0.1:8000/ in your browser.
22. Configure email settings if OTP, password reset and optional email notifications are required.
23. Do not publish the Zoom Client Secret or commit the .env file to a public repository.
FAQ for this project coming soon.
No reviews yet. Be the first to review!
Write a Review
Related Projects
 20% OFF
Featured
20% OFF
Featured
 25% OFF
Featured
25% OFF
Featured
 23% OFF
Featured
23% OFF
Featured
 35% OFF
Featured
35% OFF
Featured