Hospital Management System Using Python and Django
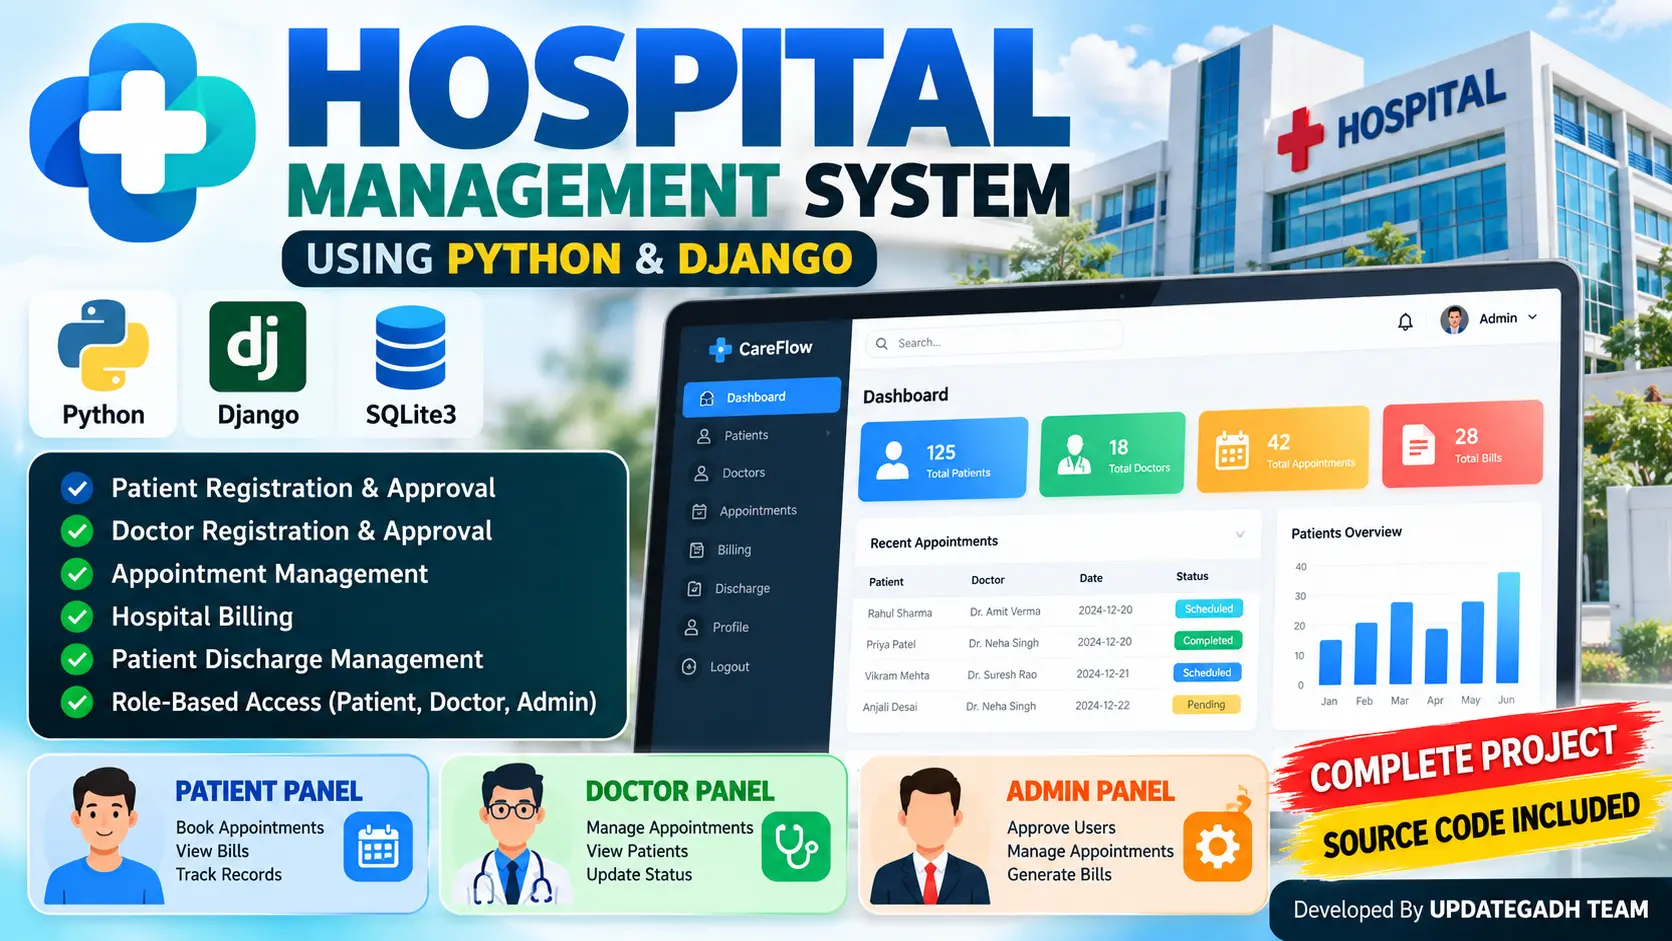
Hospital Management System built with Python and Django for managing patients, doctors, appointments, hospital billing, doctor assignments, registration approvals, and patient discharge records through separate Patient, Doctor, and Admin panels.
What You Will Get
Project Overview
Hospital Management System Using Python and Django is a web-based application designed to digitize important hospital operations through a centralized platform. The system provides separate panels for Patients, Doctors, and Administrators, with each role having specific responsibilities and permissions.
The application manages patient registration, doctor approvals, appointments, doctor assignments, hospital billing, and patient discharge records. It is developed using Python and Django with SQLite3 as the database and HTML, CSS, and JavaScript for the interface.
Available Features
- Patient registration and approval
- Doctor registration and approval
- Secure login
- Patient profile management
- Doctor profile management
- Patient health issue and symptom information
- Doctor assignment
- Appointment management
- Appointment status updates
- Appointment cancellation
- Hospital bill generation
- Consultation charge management
- Room charge management
- Medicine charge management
- Additional medical expense management
- Total bill calculation
- Printable billing information
- Patient discharge management
- Role-based access control
- Server-side validation
- CSRF protection
- Responsive interface
Patient Panel
The Patient Panel allows patients to register and access the system after administrator approval. Patients can manage their profile information, provide health issue and symptom details, view scheduled appointments, check appointment status, and access hospital billing information.
Patients can also print or save their billing information for their records.
Doctor Panel
The Doctor Panel provides doctors with access to their assigned patients and scheduled appointments after administrator approval. Doctors can manage their profile, view patient information and symptoms, update appointment status, and cancel appointments when required.
Admin Panel
The Admin Panel provides centralized control over hospital operations. Administrators can approve or reject patient and doctor registrations, manage patients and doctors, create appointments, assign doctors, manage hospital billing, and maintain patient discharge records.
Appointment Management
The appointment module connects patients, doctors, and administrators. Administrators can create appointments and assign patients to appropriate doctors. Doctors can view their scheduled appointments and update appointment status as required.
Hospital Billing
The billing module allows administrators to generate hospital bills containing different types of medical expenses. The system supports consultation charges, room charges, medicine costs, and additional medical expenses.
The system calculates the total bill and maintains patient billing records. Patients can access printable billing information from their dashboard.
Patient Discharge Management
Administrators can record patient discharge information after completion of the hospital stay. This provides a structured way to maintain discharge records within the hospital management workflow.
User Roles and Permissions
- Patient: Registration, profile information, appointments, appointment status, and billing.
- Doctor: Doctor profile, assigned patients, patient symptoms, appointments, and appointment status.
- Admin: Registration approvals, patient management, doctor management, appointments, doctor assignment, billing, and discharge records.
Security and Access Control
The system uses role-based access control so users can access only the modules permitted for their role. Authentication protects dashboard access, while backend authorization restricts unauthorized operations through direct URLs.
Forms also use server-side validation and CSRF protection for a safer application workflow.
Responsive Design
The interface is designed for desktop, laptop, tablet, and mobile screen sizes. Dashboards, tables, forms, navigation elements, and management pages provide a consistent user experience across different devices.
Technology Stack
- Programming Language: Python
- Framework: Django
- Frontend: HTML, CSS, JavaScript
- Database: SQLite3
- Architecture: Django Web Application
Software and Tools Required
- Python 3.x
- pip
- Visual Studio Code
- Web Browser
- SQLite3
More Details and Full Documentation
Project Modules
Patient Profile Module
Patient Approval Module
Doctor Registration Module
Doctor Profile Module
Doctor Approval Module
Patient Management Module
Doctor Management Module
Doctor Assignment Module
Appointment Management Module
Appointment Status Module
Hospital Billing Module
Consultation Charges Module
Room Charges Module
Medicine Charges Module
Additional Medical Expenses Module
Patient Discharge Module
Role-Based Access Control
Authentication Module
Security and Validation Module
Responsive Dashboard Module
SQLite3 Database
Installation Guide
1. Install Python 3.x on your computer.
2. Install Visual Studio Code.
3. Extract the project files.
4. Open the project folder in Visual Studio Code.
5. Open the terminal inside the project folder.
6. Navigate to the project directory using: cd hospital_management_system
7. Create a virtual environment using: python -m venv venv
8. Activate the virtual environment using Windows command: venv\Scripts\activate
9. Install the required dependencies using: pip install -r requirements.txt
10. Apply database migrations using: python manage.py migrate
11. Create the administrator account using: python manage.py createsuperuser
12. Enter the required username, email address, and password when prompted.
13. Start the Django development server using: python manage.py runserver
14. Open the application at: http://127.0.0.1:8000/
15. Log in as Admin and manage patient and doctor registrations, appointments, billing, and discharge records.
16. Patients and Doctors can register through their respective registration pages and access their panels after Admin approval.
FAQ for this project coming soon.
No reviews yet. Be the first to review!
Write a Review
Related Projects
 20% OFF
Featured
20% OFF
Featured
 35% OFF
Featured
35% OFF
Featured
 35% OFF
Featured
35% OFF
Featured
 25% OFF
Featured
25% OFF
Featured