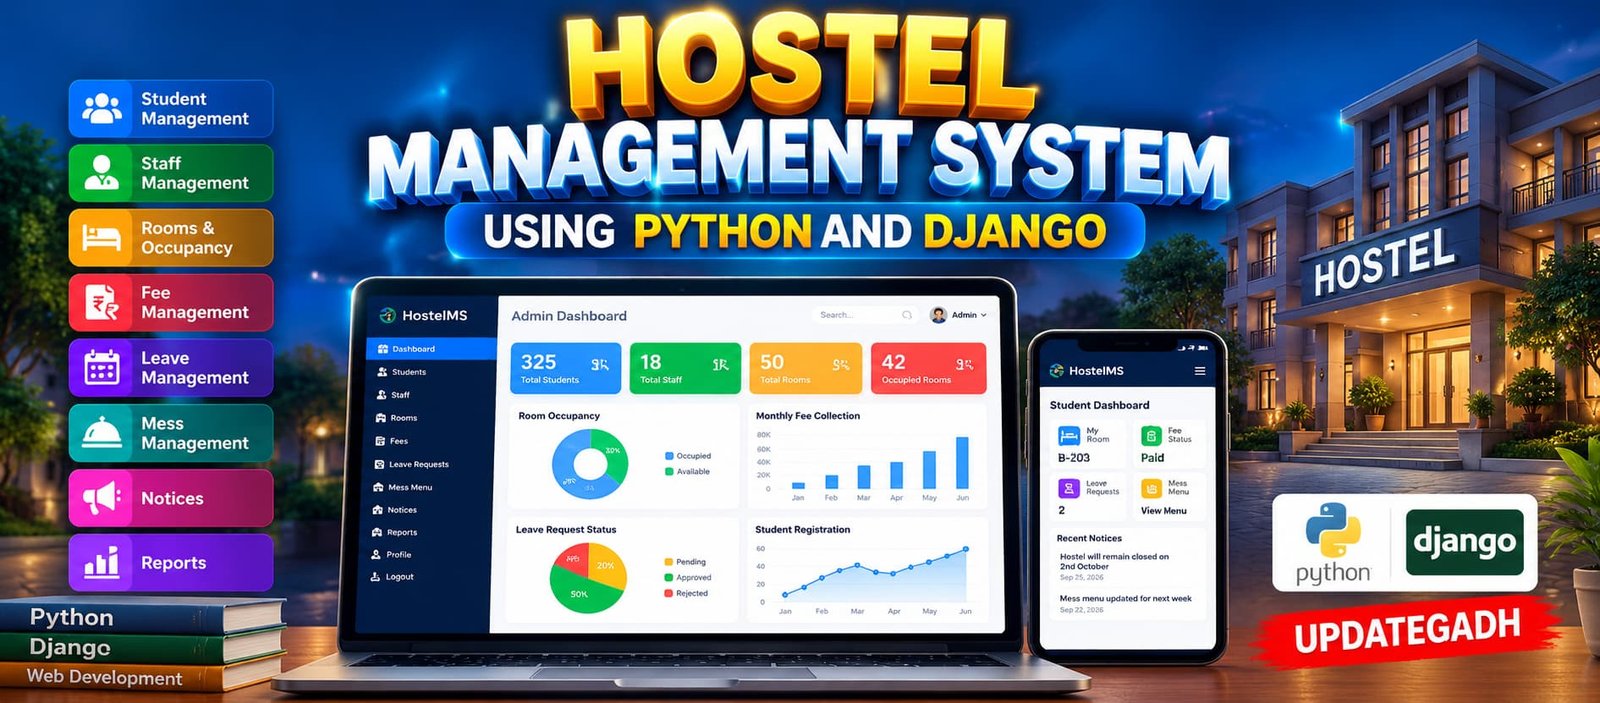
Hostel Management System Using Python and Django
Hostel Management System Using Python and Django is a web-based application for managing students, staff, rooms, occupancy, hostel fees, leave requests, mess information, notices, and reports. The system provides separate Admin, Staff, and Student panels with role-based access and an Admin-only dashboard with database-driven graphs.
What You Will Get
Hostel Management System Using Python and Django
Hostel Management System is a Python and Django based web application designed to simplify and organize hostel administration. The system provides a centralized platform for managing students, staff, rooms, occupancy, hostel fees, leave requests, mess information, notices, and other hostel-related records.
The application provides separate Admin, Staff, and Student panels with role-based access. Each panel is designed according to the responsibilities of the respective user, helping keep administrative and operational activities organized.
Key Features
- Separate Admin, Staff, and Student panels
- Role-based access control
- Student management
- Staff management
- Room and occupancy management
- Hostel fee management
- Leave request management
- Mess menu management
- Hostel information management
- Notice management
- Reports based on available project data
- Admin profile management
- Staff profile management
- Password change functionality
- Responsive dashboard interface
Admin Dashboard
The Admin Dashboard works as the central management area of the application. It provides KPI cards and database-driven graphs for monitoring hostel operations. The graphs are available only inside the Admin Panel and are not displayed on Staff or Student dashboards.
Depending on the available database information, the Admin dashboard can display student statistics, room occupancy, fee payment status, leave request status, monthly fee information, and student registration trends.
Staff Panel
The Staff Panel provides a separate workspace for hostel staff members. Staff can access operational information related to students, rooms and occupancy, leave records, fees, mess management, hostel information, notices, and reports according to their permissions.
Staff members can also manage their own profile information and change their password where permitted.
Student Panel
The Student Panel focuses on the student's own hostel information. Students can view personal details, assigned room information, fee status, leave records, mess menu, and hostel notices according to the permissions provided by the system.
Room and Occupancy Management
The Room Management section helps maintain hostel accommodation information. Authorized users can view room numbers, room types, capacity, occupied beds, available beds, assigned students, and occupancy status.
Fee Management
The Fee Management module maintains student hostel fee information. Administrators can manage fee records while authorized users can view relevant payment status, pending dues, due dates, and payment history.
Leave Management
The Leave Management module allows students to submit leave requests through the system. Authorized users can review applications and track their status, including pending, approved, and rejected requests.
Mess Management
The Mess Management module maintains hostel meal information. Users can view daily or weekly menus covering breakfast, lunch, and dinner. Authorized users can update menu information according to their project permissions.
Admin Profile
The system includes a dedicated Admin Profile section where administrators can view and update permitted personal information. The profile can contain details such as name, email, phone number, address, username, and profile photo. Administrators can also change their account password.
Technology Stack
| Technology | Purpose |
|---|---|
| Python | Main programming language |
| Django | Web application framework |
| HTML | Web page structure |
| CSS | Interface styling and responsive design |
| JavaScript | Interactive frontend functionality |
| SQLite | Application database |
Software Requirements
- Python
- Django
- Visual Studio Code or another Python IDE
- SQLite
- Modern web browser
More Details and Full Documentation
For complete project information, features, installation instructions, screenshots, and technical details, visit the original UpdateGadh project page.
Project Modules
2. Staff Module
3. Student Module
4. Student Management Module
5. Staff Management Module
6. Room Management Module
7. Occupancy Management Module
8. Hostel Fee Management Module
9. Leave Request Management Module
10. Mess Management Module
11. Hostel Information Module
12. Notice Management Module
13. Reports Module
14. Admin Profile Module
15. Staff Profile Module
16. Password Change Module
17. Admin Dashboard Analytics Module
18. Role-Based Access Control Module
Installation Guide
1. Install Python on your computer.
2. Install Visual Studio Code or another Python-compatible IDE.
3. Extract the Hostel Management System project.
4. Open the extracted project folder in Visual Studio Code.
5. Open the integrated terminal.
6. Create a virtual environment using: python -m venv venv
7. Activate the virtual environment on Windows using: venv\Scripts\activate
8. Install the required dependencies using: pip install -r requirements.txt
9. Apply the database migrations using: python manage.py migrate
10. Create an administrator account using: python manage.py createsuperuser
11. Start the Django development server using: python manage.py runserver
12. Open the local server address displayed in the terminal in your web browser.
13. Log in through the Admin panel.
14. Add and manage students, staff, rooms, fees, leave records, mess information, and notices.
15. Verify that the Admin dashboard graphs display the available database information.
16. Test the Staff panel and Student panel with their respective accounts.
FAQ for this project coming soon.
No reviews yet. Be the first to review!
Write a Review
Related Projects
 20% OFF
Featured
20% OFF
Featured
 Hot
Hot
 25% OFF
Featured
25% OFF
Featured
 11% OFF