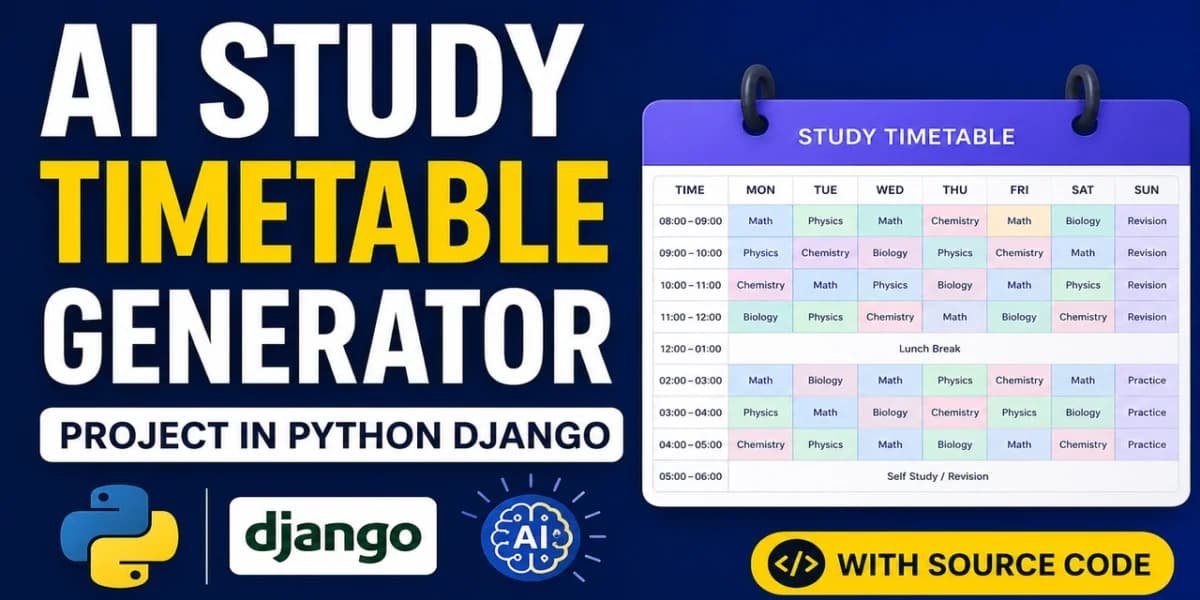
AI Study Timetable Generator Project in Python Django
AI Study Timetable Generator is a Python and Django based web application that converts a university syllabus PDF into a personalized day-wise study timetable. It extracts subjects, units, and topics, estimates topic difficulty using TF-IDF and keyword-based scoring, distributes study workload according to available hours, and adds spaced repetition sessions.
What You Will Get
AI Study Timetable Generator Project in Python Django
AI Study Timetable Generator is a Django-based web application that helps students create personalized study plans directly from their syllabus documents. The system allows a student to upload a university syllabus PDF and automatically converts its contents into a structured study plan covering subjects, units, topics, study sessions, and revision activities.
The project combines PDF processing, Natural Language Processing, machine learning based difficulty scoring, custom scheduling logic, and spaced repetition. Students can review extracted topics, correct the syllabus structure when required, enter their exam date and available study hours, and generate a complete day-wise timetable.
Key Features
- Student registration and login
- Student course, semester, and university profile
- Syllabus PDF upload
- Drag-and-drop syllabus upload
- Automatic subject, unit, and topic extraction
- Editable topic tree for manual corrections
- Exam date configuration
- Weekday and weekend study-hour configuration
- One-click timetable generation
- Spaced repetition revision sessions
- Daily study task dashboard
- Mark topics as completed
- Postpone study tasks
- Mark difficult topics
- Study streak tracking
- Progress analytics
- Subject-wise completion tracking
- Weekly study-hour tracking
- PDF timetable export
- CSV timetable export
- Adaptive timetable rescheduling
- Subject weightage balancing
- Daily workload and burnout control
- Django Admin dashboard
- Parsing log viewer
- Usage reports
Technology Stack
| Technology | Purpose |
|---|---|
| Python 3 | Application and scheduling logic |
| Django | Web framework, authentication, routing, and ORM |
| MySQL | Database management |
| pdfplumber | Syllabus PDF text and layout extraction |
| scikit-learn | TF-IDF based difficulty scoring |
| NLTK | Topic text processing |
| Bootstrap 5 | Responsive interface |
| Chart.js | Progress and coverage visualizations |
| ReportLab | PDF timetable generation |
| Python CSV | CSV timetable export |
| Gunicorn | Production deployment readiness |
Project Workflow
- Student registers and completes the profile.
- Student uploads the university syllabus PDF.
- The parser extracts subjects, units, and topics.
- The student reviews and corrects the extracted topic structure.
- The difficulty engine assigns effort scores to topics.
- The student enters the examination date and available study hours.
- The scheduler distributes the topics across the available days.
- The spaced repetition engine adds revision sessions.
- The generated timetable is displayed through a calendar and daily task view.
- Completed or postponed tasks update the remaining schedule.
- Progress analytics are updated as the student continues studying.
- The timetable can be exported as PDF or CSV.
Software Requirements
- Python 3.10 or above
- MySQL Server 8.0 or above
- pip package manager
- Visual Studio Code or PyCharm
More Details and Full Documentation
For complete project information, source documentation, setup instructions, screenshots, and additional technical details, visit the original UpdateGadh project page.
Project Modules
2. Student Profile Module
3. Syllabus PDF Upload Module
4. PDF Parsing Module
5. Subject Extraction Module
6. Unit and Topic Extraction Module
7. Manual Topic Correction Module
8. Exam Date and Availability Module
9. Difficulty Scoring Module
10. AI Timetable Generation Module
11. Subject Weightage Module
12. Spaced Repetition Module
13. Adaptive Rescheduling Module
14. Daily Task Module
15. Study Streak Module
16. Progress Analytics Module
17. PDF Export Module
18. CSV Export Module
19. Django Admin Module
20. Parsing Log Module
21. Usage Reports Module
Installation Guide
1. Install Python 3.10 or above.
2. Install MySQL Server 8.0 or above.
3. Install pip package manager.
4. Install Visual Studio Code or PyCharm.
5. Extract the AI Study Timetable Generator project.
6. Open a terminal inside the extracted project directory.
7. Open the project folder in your code editor.
8. Create a virtual environment using: python -m venv venv
9. Activate the virtual environment on Windows using: venv\Scripts\activate
10. For Linux or macOS, activate it using: source venv/bin/activate
11. Install project dependencies using: pip install -r requirements.txt
12. Open MySQL or phpMyAdmin.
13. Create the project database using: CREATE DATABASE study_planner_db CHARACTER SET utf8mb4;
14. Open studyplanner/settings.py.
15. Configure the MySQL database name as study_planner_db.
16. Configure the MySQL username and password.
17. Set the database host to 127.0.0.1.
18. Set the database port to 3306.
19. Run: python manage.py makemigrations
20. Run: python manage.py migrate
21. Create the Django administrator account using: python manage.py createsuperuser
22. Start the Django server using: python manage.py runserver
23. Open http://127.0.0.1:8000/ for the student portal.
24. Open http://127.0.0.1:8000/admin/ for the Django Admin dashboard.
FAQ for this project coming soon.
No reviews yet. Be the first to review!
Write a Review
Related Projects
 20% OFF
Hot
20% OFF
Hot
 Hot
Hot
 23% OFF
Featured
23% OFF
Featured
 25% OFF
Featured
25% OFF
Featured