 23% OFF
 Agentic RAG AI System Using Python
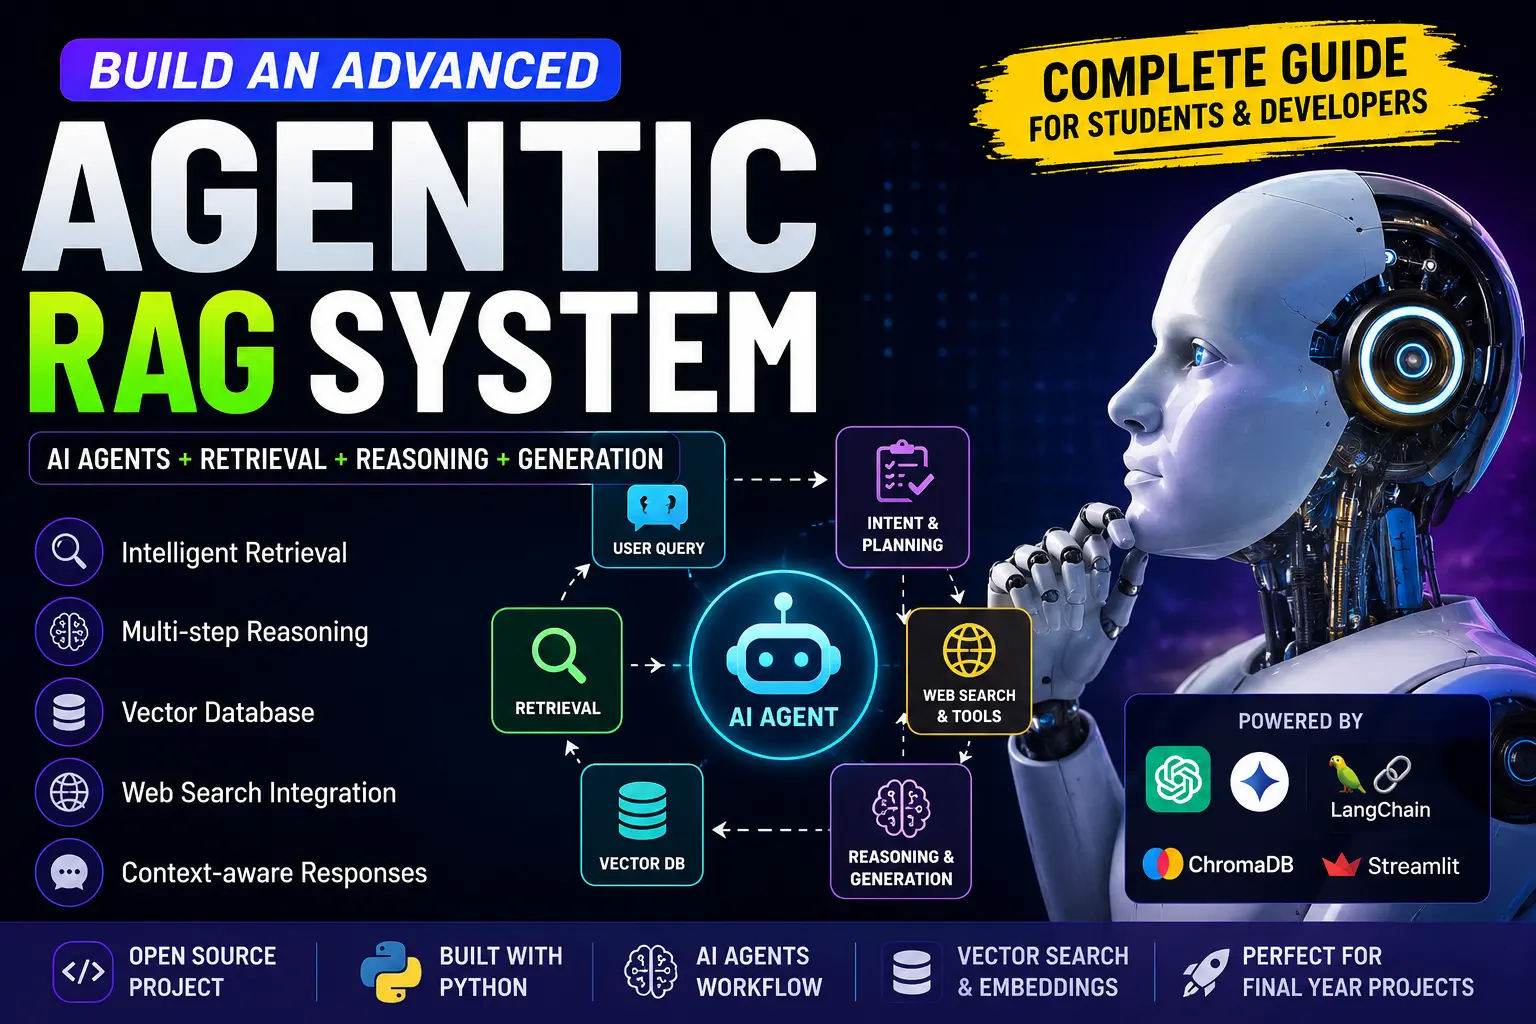
Agentic RAG AI System Using Python is an advanced AI project that combines AI agents, Large Language Models, vector databases, semantic search, and multi-step reasoning to build intelligent and context-aware AI applications.
Read more- Built with
- PythonMachine LearningBootstrapHTML/CSS
- You get
- Source codeDatabaseProject reportPPTSetup guide
- Delivery
- Instant download after payment
Agentic RAG AI System Using Python is an advanced AI-powered project that combines Large Language Models (LLMs), AI Agents, Vector Databases, Semantic Search, and Multi-Step Reasoning. Unlike traditional RAG systems, Agentic RAG can intelligently analyze user queries, select retrieval strategies, reason over retrieved information, and generate contextual responses.
This project is designed for students and developers who want to learn how modern AI applications are built using Python, AI agents, vector databases, and Large Language Models. The system can be used for applications such as college AI assistants, healthcare document retrieval, customer support, legal research, and coding assistance.
Key Features
- Intelligent Query Analysis: Understands user intent before retrieving information.
- Dynamic Retrieval: Uses intelligent retrieval strategies based on the user query.
- Semantic Search: Finds contextually relevant information from available data.
- Vector Database Support: Supports vector storage and similarity search.
- Multi-Step Reasoning: AI performs reasoning before generating the final response.
- Context-Aware Responses: Generates responses based on retrieved contextual information.
- Memory Support: Maintains conversational context.
- Tool Integration: Supports external APIs and tools.
- AI Agent Workflow: Uses agents to analyze queries and determine appropriate retrieval and reasoning steps.
Technology Stack
| Technology | Purpose |
|---|---|
| Python | Core Backend Language |
| Streamlit | AI Chatbot Interface |
| HTML/CSS | Frontend Design |
| JavaScript | Interactive Functionality |
| Flask/FastAPI | API Development |
| LangChain | RAG Pipeline Development |
| LlamaIndex | Document Indexing |
| CrewAI | Multi-Agent Workflows |
| Agno | Agent Orchestration |
| ChromaDB | Local Vector Storage |
| Pinecone | Cloud Vector Database |
| FAISS | Fast Similarity Search |
| Qdrant | AI Search Engine |
System Requirements
- Python 3.x
- Pip
- Modern Web Browser
- OpenAI API Key
- Internet Connection for API-based AI services
How It Works
The Agentic RAG system follows multiple intelligent processing stages. First, the user submits a query. An AI agent analyzes the user's intent and selects an appropriate retrieval strategy. Relevant documents are then retrieved from the available knowledge source or vector database. The AI performs multi-step reasoning using the retrieved information and finally generates a contextual response using an LLM.
Perfect For
- B.Tech Projects
- MCA Projects
- BCA Projects
- MSc IT Projects
- AI/ML Research Projects
- Final Year Projects
- Python AI Projects
- Generative AI Projects
Advantages of Agentic RAG
- Better Accuracy: Helps reduce hallucinations through intelligent retrieval.
- Intelligent Retrieval: Selects suitable retrieval strategies dynamically.
- Real-Time Information: Supports API and web integration.
- Scalable Architecture: Suitable for scalable AI applications.
- Enhanced User Experience: Provides more contextual responses.
Real-World Applications
- AI Customer Support
- University AI Assistant
- Healthcare AI System
- Legal AI Assistant
- Coding AI Assistant
Learning Outcomes
- Retrieval-Augmented Generation
- AI Agent Workflow Design
- Semantic Search Systems
- Vector Embedding Techniques
- Prompt Engineering
- LLM Integration
- Intelligent AI Architectures
Watch Project Demo
More Details & Full Documentation
AI Agent Module
- Intelligent query analysis
- Dynamic retrieval
- Multi-step reasoning
- Context-aware response generation
- Memory support
- Tool integration
RAG Module
- Document retrieval
- Semantic search
- Vector embeddings
- Vector database integration
- Context retrieval
AI Framework Module
- LangChain
- LlamaIndex
- CrewAI
- Agno
Vector Database Module
- ChromaDB
- Pinecone
- FAISS
- Qdrant
Application Interface
- Streamlit AI chatbot interface
- Flask/FastAPI API development
- HTML/CSS frontend
- JavaScript functionality
Prerequisites
- Python 3.x
- Pip
- OpenAI API Key
Step 1: Download the Project
Download and extract the complete project source code.
Step 2: Open Project Directory
cd awesome-ai-apps/rag_apps/agentic_rag
Step 3: Install Dependencies
pip install -r requirements.txt
Step 4: Configure API Key
Create a .env file in the project directory and add
OPENAI_API_KEY=your_api_key
Step 5: Run the Application
streamlit run app.py
Step 6: Open the Application
Open the Streamlit URL displayed in the terminal.
Stuck while running it? Chat with us on WhatsApp for free installation help.
No reviews yet. Be the first to review this project.